
This is an old revision of the document!
Table of Contents
Layerone Demoscene Board - Getting Started
Power Up
There are two ways to power the Layerone Demoscene Board: USB microAB or External power.
USB microAB - 5V:

External power input range: 4.75v to 15.0v:

Development Environment
The Layerone Demoscene Board is based on the PIC24FJ256DA206. You can program this microcontroller using MPLAB X and the XC16 Compiler. You will need both.
Instructions:
- MPLAB X Download Site: http://www.microchip.com/mplab/mplab-x-ide
- Click the “Downloads” tab near the bottom of the page and download the latest version of MPLAB X IDE
- Install MPLAX X IDE
- XC16 Compiler Download Site: http://www.microchip.com/mplab/compilers
- Click the “Downloads” tab near the bottom of the page and download the latest XC16 compiler
- Install the XC16 Compiler
Example C Code - Getting Started
Instructions:
- Download the Example Project - L1Demo Getting Started:
https://github.com/arkorobotics/L1Demo_Getting_Started - Open MPLAB X IDE
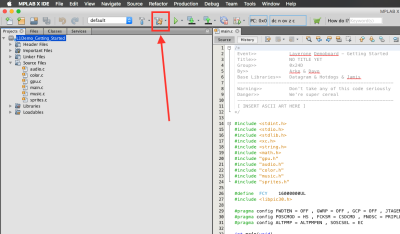
- Select“File→Open Project” and navigate to the “L1Demo_Getting_Started” folder
- Open the project “L1Demo_Getting_Started.X”
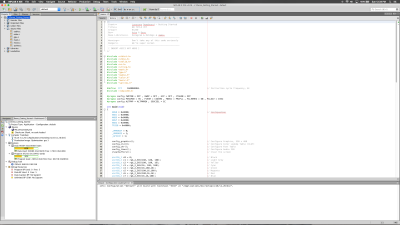
- Click the “Clean and Build Project” icon to build the hex file
- The generated .hex file will be available at:
“L1Demo_Getting_Started/L1Demo_Getting_Started.X/dist/default/production/L1Demo_Getting_Started.X.production.hex”


Programming
Once you've compiled your code using MPLAB X, you can upload the “.hex” file using either method:
- USB Programming via Bootloader (default, requires no additional hardware)
OR
- Programming via PICKIT3 (highly-recommended, requires additional hardware)
- Pros:
- Cons:
USB Bootloader Programming
The Layerone Demoscene Board ships with a USB Bootloader programmed to Flash Memory so that anyone with a Mac or PC can program the board without any additional hardware such as a debugger.
Instructions:
- Download and Install Mono:
http://www.mono-project.com/download/stable/ - Download and Install the L1Demo GUI Loader (Mac/Windows/Linux):
https://github.com/thedeltaflyer/L1Demo-GUI-Loader/releases/ - Run the “L1Demo GUI Loader” application. On newer Macs, you may need to right-click on the app icon and hit “Open”.
- Connect your L1 Demoscene Board to your Mac/PC using a USB A to USB MicroAB cable
- Power-up the L1 Demoscene Board using either USB or external power (see “Power Up” section)
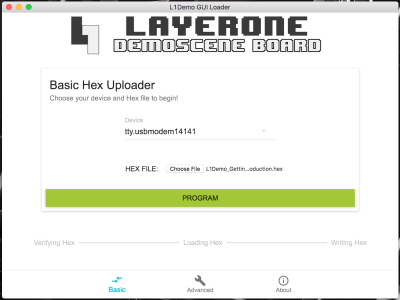
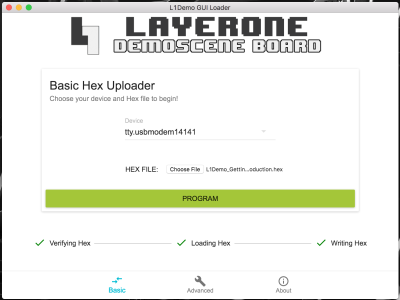
- Click “Choose File” on GUI and navigate to the .hex file you wish to flash to the board:
- IMPORTANT: *The next sequence of events are time sensitive*
- Press the RESET button on the L1 Demoscene Board
- On the GUI, under the “Device” drop down, select the USB COM/tty port for the L1 Demoscene Board
- Press the RESET button on the L1 Demoscene Board again
- Click the “PROGRAM” button on the GUI:
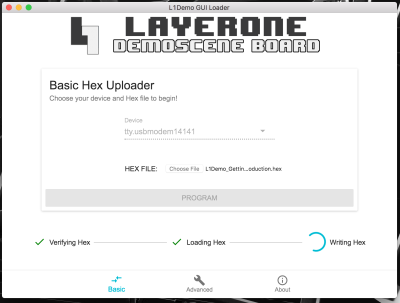
- The program will Verify, Load, and Write the hex file to the board:


Additional Notes:
- When you power up the board without a jumper, you have 5 seconds to upload your new hex file. After 5 seconds, the bootloader will automatically load the application from flash memory. If you need more than 5 seconds, you can place the Jumper on PGEC1 and PGED1 to force the bootloader to load indefinitely at reset:
- To force the application to load, place a jumper on PGED1 and GND:


PICKIT3 Programming
- WARNING: The following procedure will erase the bootloader on the board!
- Purchase a PICKIT3: https://www.sparkfun.com/products/9973 (or from your favorite vendor)
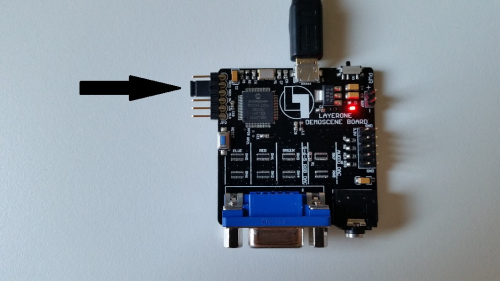
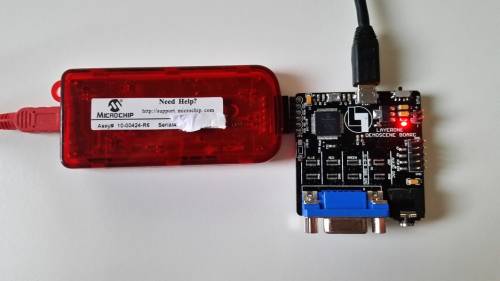
- Connect the PICKIT3 to the L1 Demoscene Board:
- Open MPLAB X
- Select the PICKIT3 as the programming device
- For MPLAB X: Select PICKIT3 in the Project Properies → Device
- Upload by clicking the “Download” button

Documentation
Datasheet for PIC24FJ256DA206: pic24fj256da206.pdf
Graphics Controller Module datasheet for PIC24FJ256DA206: 39731a.pdf
Code
Hardware
Board and Schematic Files: L1 Demoscene Board & Schematic